Recently I found an interesting article on frequency separation on the Fstoppers’ pages that made me curious about this method. Seems to be pretty much standard now for beauty retouching. I learned something, but the article left me with unsanswered questions:
- Why is Linear Light the correct blend mode for rejoining the two layers created during frequency separation?
- What exactly is the difference between addition and subtraction blend mode?
- Why should there be a difference in the process depending on the colour-depth (8-bit versus 16-bit)?
So I decided to have a closer look. But first, I had to understand Blend Modes in general. Might be worth starting there if you have never dealt with the subject before.
The Task
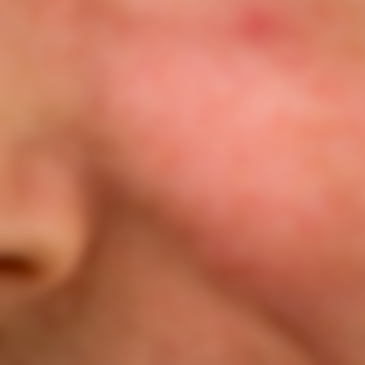
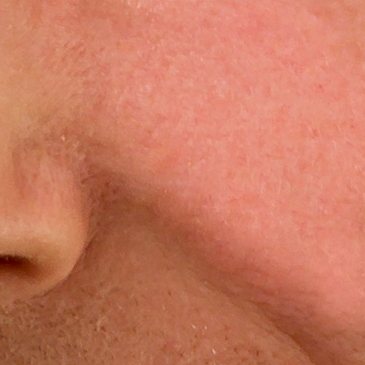
We want to split one image into two such that one of the resulting images only contains fine detail, the other the large scale changes in colour and brightness. Take the following crop from a portrait as an example:

You can see pores, a light stubble, skin texture, and you can discern features like part of a nose, a line, shadows. Here the skin texture should end up in the first image, colours and larger shadows defining the shape in the second. Later on I’d like to combine the two images again in a way that we – unless we manipulated one of the images – get the original back.
“Why?”, you may ask. Simply because after this so called frequency separation you can retouch skin-tones without having to worry about the texture and vice versa. If I wanted to get rid of the red spot you can see top right, I’d just correct the colour and brightness and leave the texture alone. All the unmodified areas will, once blended again, look unchanged. The manipulated area will look very natural. So that’s why, I’ll show you how.
But before we start, some (very little) theory.
Frequencies
Fine structures mean spatially rapid changes of brightness, or a strong local contrast. You can interpret the changes of brightness as a superposition of waves. Waves, you may remember from your physics lessons, have a frequency, in this case a spatial frequency. Fine structure means high frequency, changes over a larger distance means low frequency.
Frequency Filtering
If you are an audiophile, you may have heard of high-pass or low-pass filters used in audio equipment. They do what their names say, the low-pass lets the low frequencies pass, i.e. the bass notes, while the high-pass does the same for high frequencies. For the latter, we indeed have a ready-made filter in Photoshop. It lets the high frequencies of an image pass and blocks the low frequencies yielding an image wich is mostly grey, close to 50 %, with little deviations on a small scale. You can control the scale – or as the audiophile might say, the cutoff frequency – with the radius parameter.
Photoshop also knows low-pass filters, only they are called differently. You may be able to identify them yourself. What evens out all the small scale changes? Blurring does. There are several blur filters available. For our purpose it does not really matter which one we choose, though you have to be careful with filters like surface blur or smart blur, as they tend to create sharp edges, which mean high frequency again. I personally would use the good old workhorse gaussian blur with a rather large radius.
Back to the Task – Splitting the Image
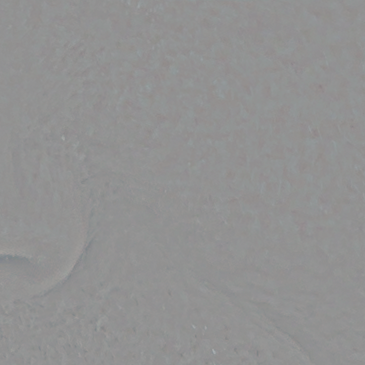
First we have an Image A. We create two copies and modify one so we get a new image B that is different from the original A. In this example I used a gaussian blur with a radius of 6 pixels:
You see, all the fine structure is gone, no skin texture to speak of left.
Now I want to create another image C from the second copy that contains only the differences between original A and B. Should be easy, just take the second copy and use the Apply Image command of Photoshop with the blend mode Subtract with A as target and B as source and be happy. Unfortunately there is a catch.
Photoshop only allows values between 0 and 1 as result, everything below 0 and above 1 gets cut off. Not a very good idea when subtracting two very similar images, there will almost certainly be some pixels with values below 0. So what we actually do is:
- divide by 2
- add ½
Thus the complete information is kept. The following formula is for a pixel-value of C:

It is easy to see that nothingis lost when you look at the extremes, i.e. combinations of 
Btw, I am showing all this for one channel only, for an RGB image this can be done for each channel separately.
The result of the “subtraction” is quite similar to that of Photoshop’s own High Pass filter – not exactly surprising.
Note
Photoshop can handle images with a depth of 8-bit, 16-bit or even 32-bit per pixel. The 1 I talked about above correspondes to 255, 65536 or 4294967295 respectively. The apply image dialogue offers two paramerters for the blend mode subtraction, scale and offset. For our intention we need 2 for scale – that is for the aforementioned division by two, and 128 for offset. Bit hard to recognise the addition of ½, but that is what it is. Regardless of the bit depth the offset has to be specified in parts of 256, and 128 divided by 256 happens to be ½. This is confusing, and probably the reason for some more complicated workflows I have seen.
One mentioned frequently is this (for 16-bit images):
- invert image B
- add the result to A
- set the scale-parameter to 2 (i. e. divide by 2)
Looking at the math I wasn’t able to find any difference to my method. My practical tests didn’t show any either, neither for 8-bit nor for 16-bit images. If you know that inversion just means subtracting the pixel value from 1, the formula is easy:

So the answer to question three is: there is no difference.
Reassembly
Now we just need another blend mode that can reassemble the two images B and C so that, if both are unchanged, we get A again. Simply adding the pixel-values won’t work of course, we scaled and shifted the result of the subtraction. So we need to find the reverse operation. So we subtract ½ from C, multiply the result by 2 and add B.

Surprisingly this is exactly the formula for the Linear Light blend mode. So my first question is answered as well: Linear Light is the reverse of Subtraction.
Using the Frequency Separation Technique
In practice you will of course not use Apply Image to join the hard-won separate images immediately again. You will instead use both images as layers, C over B, and set the blend mode for C to Linear Light. So you keep two layers you can work on separately. Of course you can add layers between the two, for example for non-destructive retouching. In the example I was able to remove the red spot while keeping the texture. Retouching is not within the scope of this article.
The remaining answer to question two you will find in my little series on Blend Modes – with more math and simulations.
I hope you liked my little excursus on frequency separation. If you have questions or find mistakes, do not hesitate to leave a comment.
Leave a Reply